7 Delicious Finger Food Recipes for Any Occasion In 2026
Whether you are hosting a birthday party, planning a game day spread, throwing a casual get-together, or simply looking for fun crowd-pleasing snacks to share, finger foods are always the answer. They are easy to eat, endlessly customizable, and somehow always the first thing to disappear from the table — no matter the crowd, no matter the occasion.
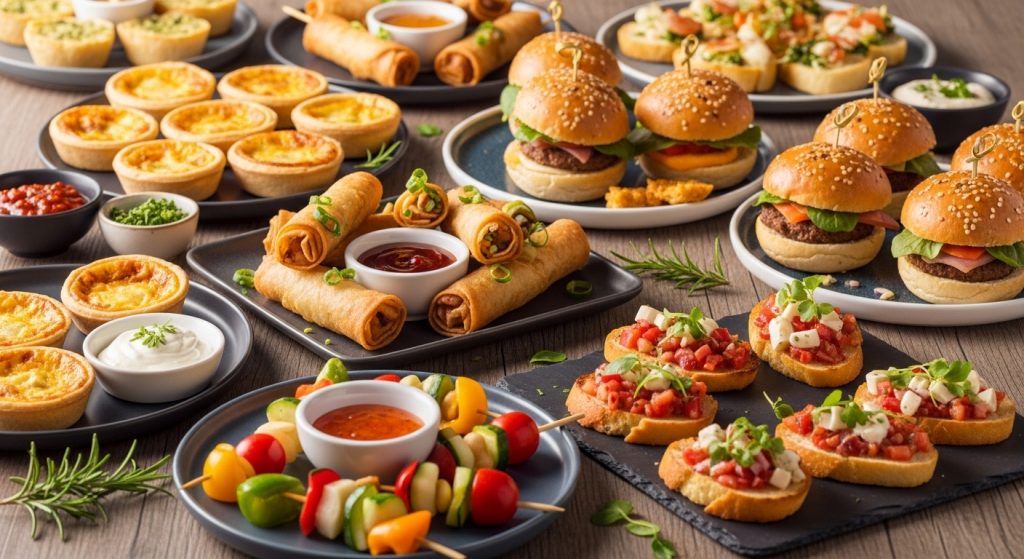
These 7 delicious finger food recipes cover every occasion from elegant party starters to casual game day classics. Every recipe is explained clearly with full ingredients and step-by-step instructions so you can pull off the perfect spread with total confidence
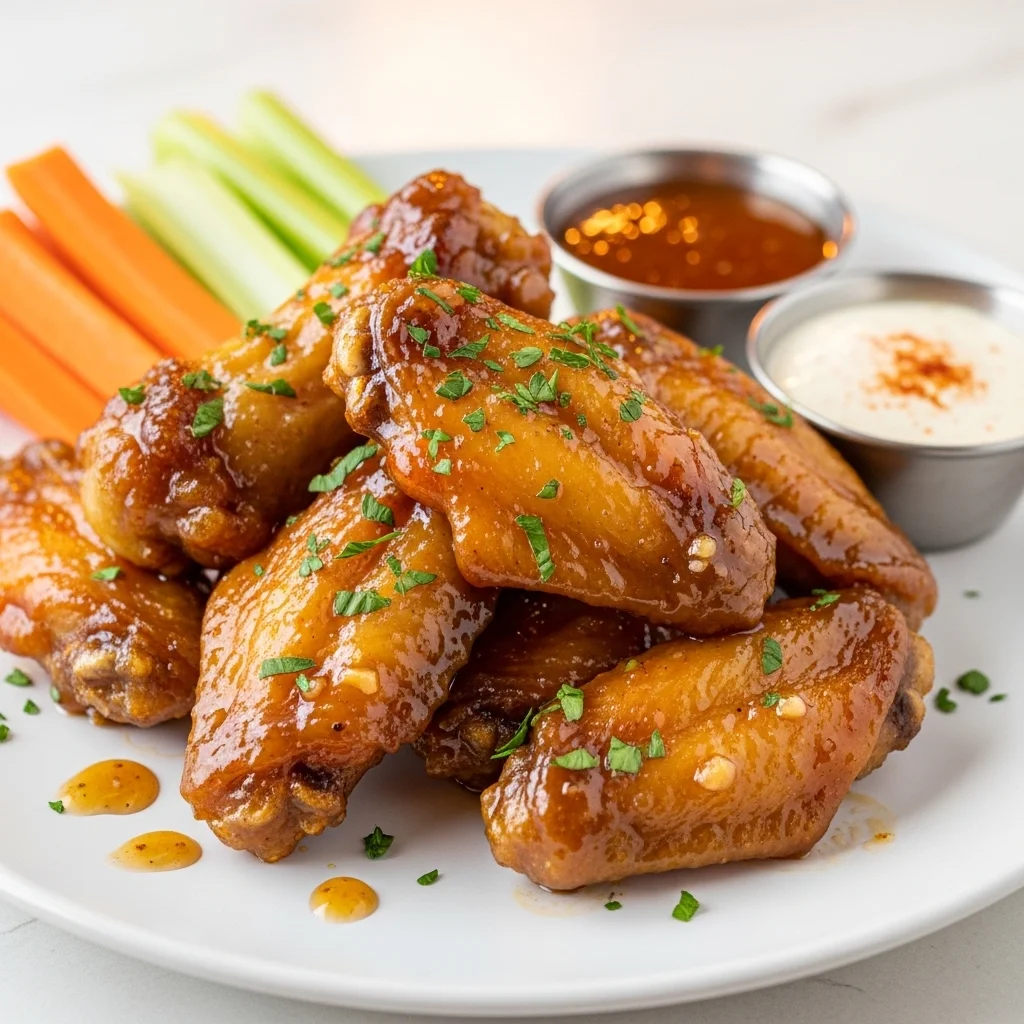
Crispy Baked Chicken Wings with Honey Garlic Sauce
Prep: 15 min | Cook: 45 min | Serves: 4–6 | Difficulty: Easy
Chicken wings are the undisputed king of finger food and this version is baked to achieve that irresistible crunch without deep frying, then tossed in a sticky, sweet, savory honey garlic sauce that is completely addictive. The secret to genuinely crispy oven-baked wings is a simple baking powder trick that transforms the skin into something golden, shatteringly crisp, and absolutely incredible.
Ingredients:
For the wings:
- 1.2kg chicken wings, split into drumettes and flats
- 1 tbsp baking powder (not baking soda — this is the crispiness secret)
- 1 tsp garlic powder
- 1 tsp onion powder
- 1 tsp smoked paprika
- 1 tsp salt
- ½ tsp black pepper
For the honey garlic sauce:
- 4 tbsp honey
- 4 tbsp soy sauce
- 4 garlic cloves, minced
- 1 tbsp butter
- 1 tbsp rice vinegar
- 1 tsp sriracha (optional)
- 1 tsp cornstarch mixed with 1 tbsp cold water
- Sesame seeds and sliced green onions to garnish
Instructions:
Pat the chicken wings completely dry with paper towels — this is the single most important step. Any moisture on the skin prevents crispiness. Dry them as thoroughly as possible, then let them air dry uncovered in the refrigerator for at least 1 hour or overnight if possible.
Preheat the oven to 220°C (425°F). Line a baking sheet with foil and place a wire rack on top. Toss the dried wings in baking powder, garlic powder, onion powder, smoked paprika, salt, and pepper until every piece is evenly coated. Arrange on the wire rack in a single layer with space between each wing.
Bake for 20 minutes, then flip every wing and bake for another 20–25 minutes. The wings should be deeply golden, visibly crispy, and the skin should look blistered and crunchy. If they need more color, broil for the final 3–4 minutes.
While the wings bake, make the honey garlic sauce: melt butter in a small saucepan over medium heat. Add minced garlic and cook for 1–2 minutes until fragrant and lightly golden. Add honey, soy sauce, rice vinegar, and sriracha.
Stir and bring to a gentle simmer. Add the cornstarch mixture and stir for 1–2 minutes until the sauce thickens to a glossy, sticky consistency.
Remove the wings from the oven and immediately transfer to a large bowl. Pour the honey garlic sauce over them and toss to coat every single wing thoroughly.
Transfer to a serving platter and garnish with sesame seeds and green onions. Serve immediately while hot and crispy.
Pro Tip: The baking powder is not a typo it raises the pH of the chicken skin and breaks down proteins, allowing it to crisp dramatically in the oven. It is the single best trick for getting a deep-fried-style crunch without a drop of oil.
Mini Caprese Skewers with Balsamic Glaze
Prep: 15 min | Cook: 0 min | Serves: 6–8 | Difficulty: Very Easy
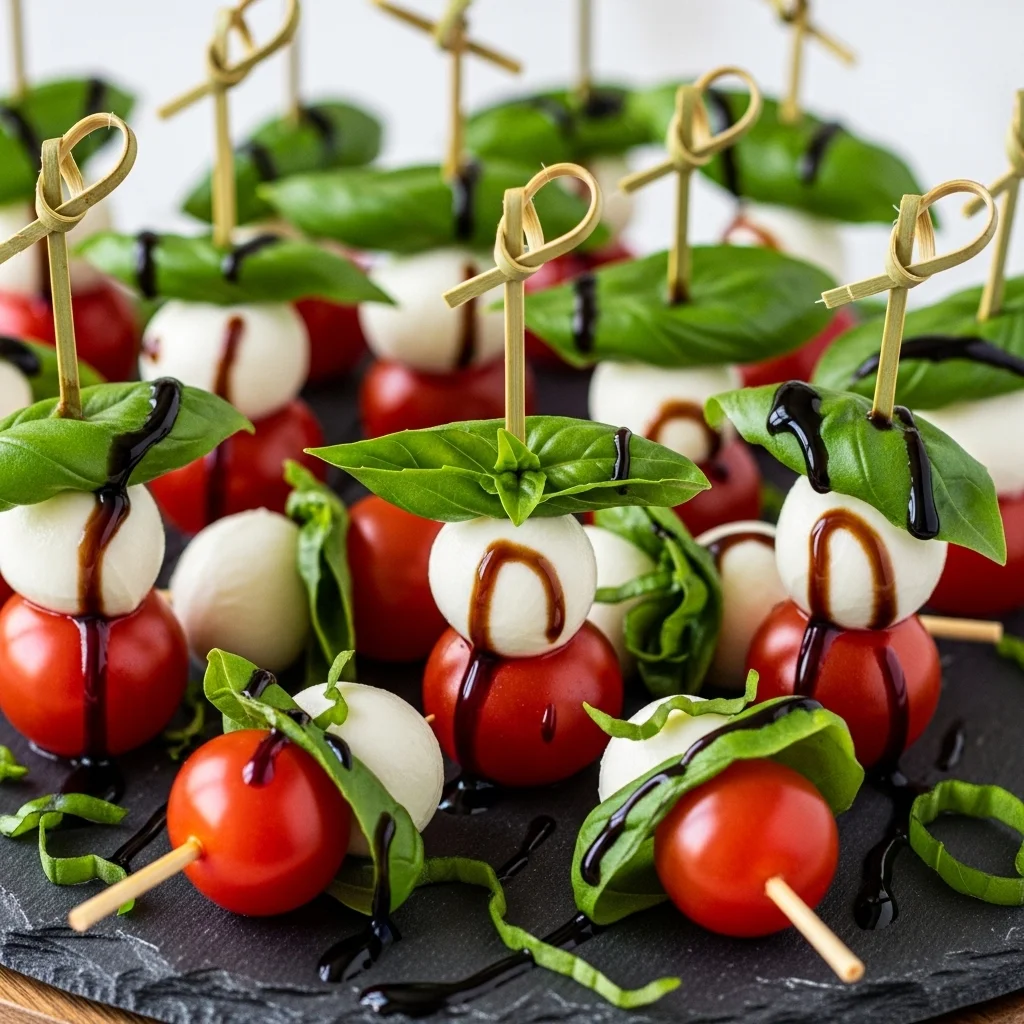
These mini caprese skewers are the most elegant, effortless finger food you can put on a party table. Fresh cherry tomatoes, creamy mozzarella balls, and fragrant fresh basil are threaded onto small skewers, drizzled with a thick, sweet balsamic glaze, and finished with a drizzle of good olive oil and flaky sea salt. They require zero cooking, take minutes to assemble, look absolutely stunning on a platter, and taste like a little bite of Italy.
Ingredients:
- 300g cherry tomatoes (a mix of red and yellow looks beautiful)
- 300g fresh mozzarella balls (bocconcini or ciliegine size)
- 1 large bunch of fresh basil leaves
- 3 tbsp good quality extra virgin olive oil
- 3 tbsp balsamic glaze (store-bought or homemade — see tip below)
- Flaky sea salt and freshly cracked black pepper
- Small wooden or bamboo skewers or toothpicks
Instructions:
Drain the mozzarella balls and pat them dry with paper towels. Wash and dry the cherry tomatoes and basil leaves thoroughly. Everything needs to be completely dry so the olive oil and balsamic glaze cling properly rather than sliding off.
Select your basil leaves medium-sized ones work best. Fold each basil leaf gently in half or into thirds so it sits neatly on the skewer without overpowering the bite.
Thread each skewer in this order: one cherry tomato, one folded basil leaf, one mozzarella ball. Push them close together so each skewer looks full and generous. Repeat until all the ingredients are used.
Arrange the assembled skewers on a large flat serving platter or wooden board. They can be laid flat or stood upright in a small glass or jar for a more dramatic presentation.
Drizzle olive oil evenly over all the skewers, then drizzle the balsamic glaze in a zigzag pattern across the whole platter. Finish with a generous pinch of flaky sea salt and freshly cracked black pepper over everything. Serve immediately or refrigerate for up to 2 hours before serving.
Pro Tip: To make a quick homemade balsamic glaze, simply simmer ½ cup of balsamic vinegar with 1 tbsp honey in a small saucepan over medium heat for 8–10 minutes until it reduces by half and coats the back of a spoon. It is dramatically better than most store-bought versions.
Loaded Potato Skins
Prep: 15 min | Cook: 1 hour | Serves: 6–8 | Difficulty: Easy
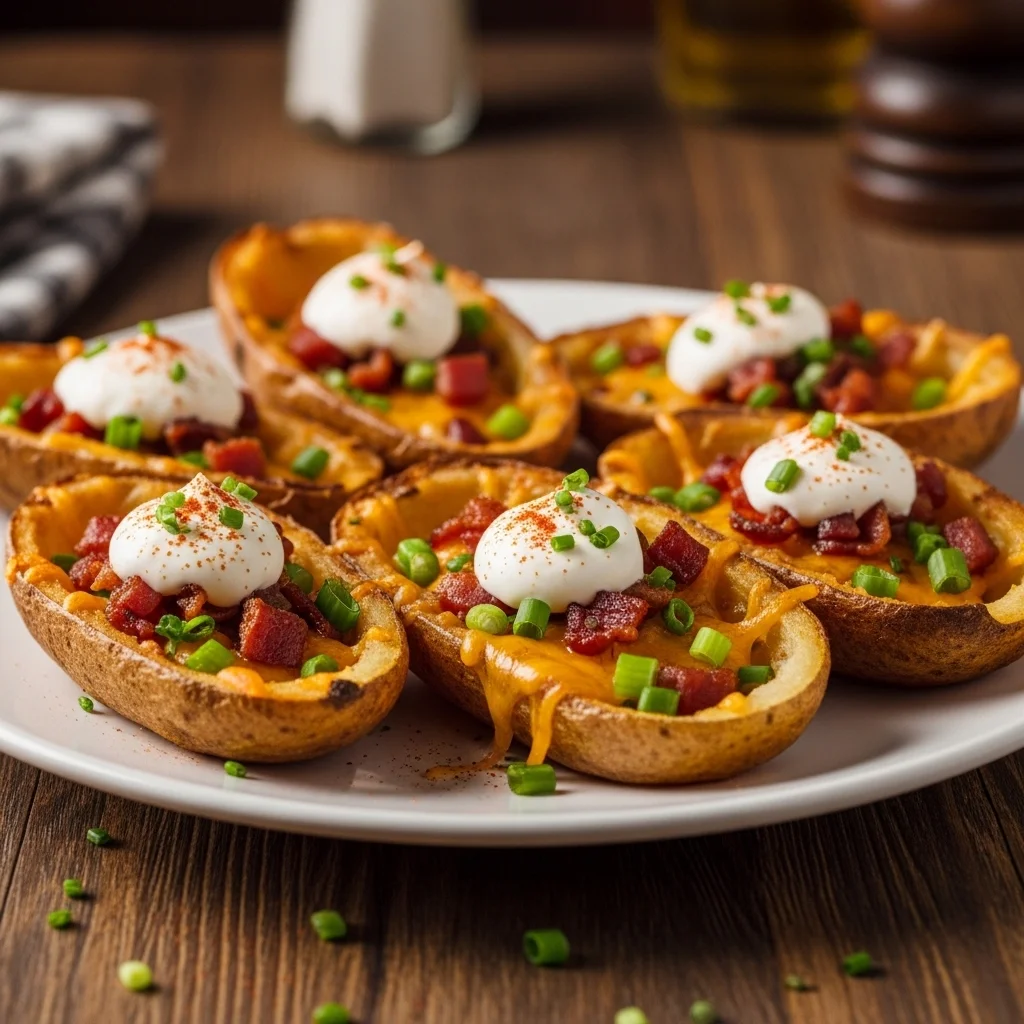
Loaded potato skins are one of the most satisfying, crowd-pleasing finger foods ever invented. Crispy baked potato shells are filled with melted cheddar cheese, crispy bacon, sour cream, and fresh chives — a combination so deeply delicious and comforting that it is genuinely hard to stop at just one.
Ingredients:
- 6 medium russet potatoes, scrubbed clean
- 2 tbsp olive oil
- 1½ cups sharp cheddar cheese, shredded
- 180g bacon, cooked until crispy and crumbled
- ½ cup sour cream
- 3 green onions, thinly sliced
- Salt and pepper to taste
- 2 tbsp melted butter
- Smoked paprika for dusting
Instructions:
Preheat oven to 200°C (400°F). Pierce each potato several times with a fork. Rub with olive oil and a generous pinch of salt. Place directly on the oven rack and bake for 50–60 minutes until the skin is firm and crispy and the interior is completely tender when pierced.
Remove the potatoes and let them cool for 10 minutes — just enough to handle safely. Cut each potato in half lengthwise. Scoop out the interior flesh leaving a wall about 1cm thick — thick enough to hold the fillings without breaking but thin enough to still be crispy. Save the scooped potato for mashed potatoes or another use.
Brush the inside and outside of each potato skin generously with melted butter. Season the insides with salt, pepper, and a light dusting of smoked paprika. Place skin-side up on a baking sheet and bake for 8–10 minutes until the skins are extra crispy.
Flip the skins so they are hollow-side up. Fill each skin generously with shredded cheddar cheese and half of the crumbled bacon. Return to the oven for 5–7 minutes until the cheese is completely melted and bubbling.
Remove from the oven and immediately top each potato skin with a small dollop of sour cream, the remaining bacon crumbles, and plenty of sliced green onions. Arrange on a serving platter and serve hot — they are best eaten straight from the oven while the cheese is melted and the skins are at their crispiest.
Pro Tip: Baking the potato skins cut-side up after scooping and brushing with butter gives them an extra layer of crispiness before adding the toppings. This double-baking step is what separates truly great potato skins from mediocre ones.
Spinach and Cream Cheese Stuffed Mushrooms
Prep: 20 min | Cook: 20 min | Serves: 6–8 | Difficulty: Easy
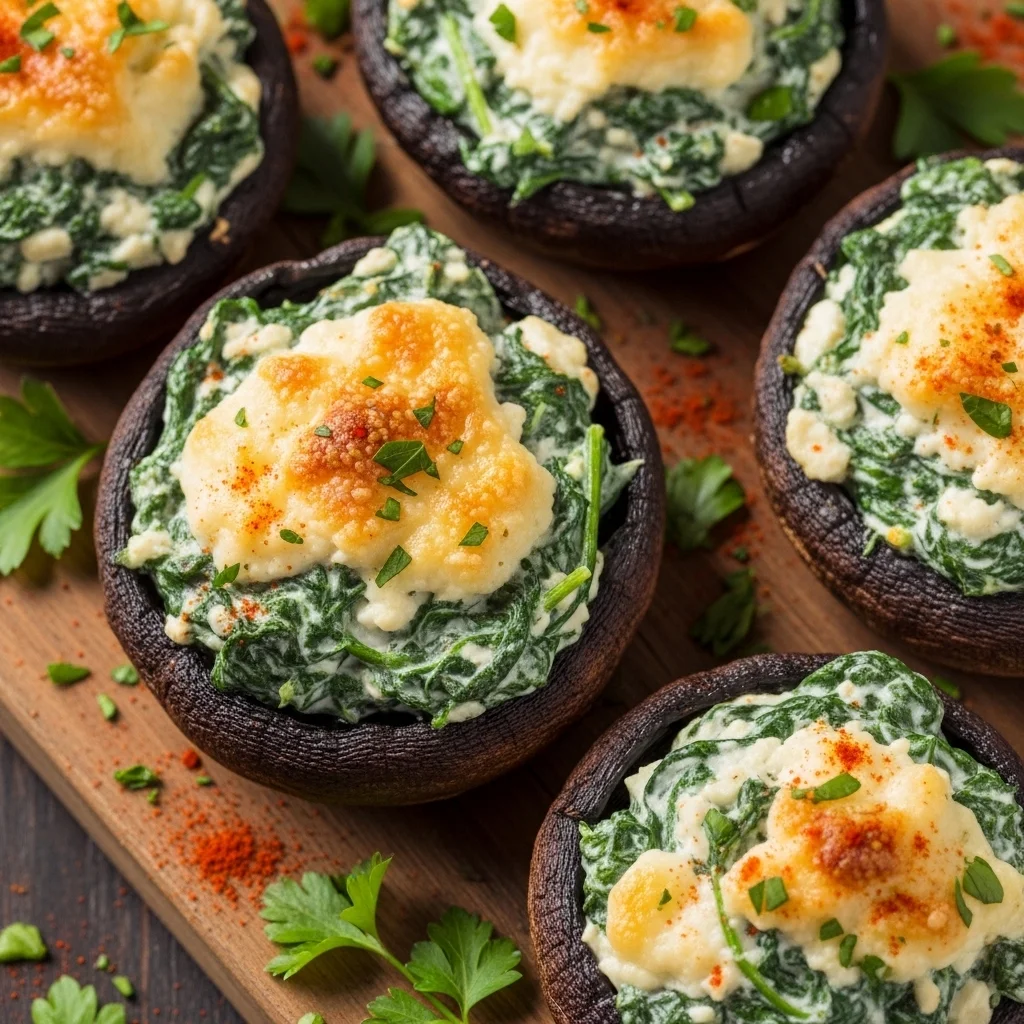
Stuffed mushrooms are the sophisticated finger food that always gets compliments at parties. Large button mushrooms are filled with a warm, creamy mixture of spinach, cream cheese, garlic, Parmesan, and herbs, then baked until golden and bubbling. They are vegetarian-friendly, bite-sized, and elegant enough for any occasion from a cocktail party to a holiday gathering.
Ingredients:
- 24 large button or cremini mushrooms, stems removed and reserved
- 225g cream cheese, softened at room temperature
- 1 cup fresh spinach, finely chopped (or ½ cup frozen spinach, thoroughly squeezed dry)
- ½ cup Parmesan cheese, finely grated
- 3 garlic cloves, minced
- 2 tbsp butter
- ¼ cup breadcrumbs
- 1 tsp dried Italian seasoning
- ½ tsp onion powder
- Salt and pepper to taste
- Fresh parsley and extra Parmesan to garnish
- Olive oil for drizzling
Instructions:
Preheat the oven to 190°C (375°F). Wipe the mushroom caps clean with a damp cloth — never wash mushrooms under water as they absorb it and become soggy. Finely chop the reserved mushroom stems.
Melt butter in a skillet over medium heat. Add the chopped mushroom stems and cook for 4–5 minutes until they release their moisture and start to turn golden. Add garlic and spinach and cook for another 2 minutes until the spinach wilts completely. Season with salt and pepper. Remove from heat and let cool for 5 minutes.
In a bowl, beat the softened cream cheese until smooth. Add the cooked mushroom stem and spinach mixture, Parmesan, Italian seasoning, and onion powder. Mix until everything is fully combined into a creamy, savory filling. Taste and adjust seasoning.
Arrange the mushroom caps hollow-side up on a lightly greased baking sheet. Fill each cap generously with the cream cheese filling, mounding it slightly above the rim. Combine breadcrumbs with a drizzle of olive oil and a pinch of Parmesan and sprinkle over the top of each filled mushroom.
Bake for 18–20 minutes until the mushrooms are tender, the filling is hot and set, and the breadcrumb topping is golden brown. Garnish with fresh parsley and extra Parmesan. Serve immediately while hot.
Pro Tip: Remove any excess moisture from the mushroom caps before filling by placing them hollow-side down on a paper towel for 10 minutes. Mushrooms release water as they bake and a dry cap means a crispier result with no watery pooling around the base.
Mini Beef Sliders with Special Sauce
Prep: 20 min | Cook: 15 min | Serves: 6–8 | Difficulty: Easy
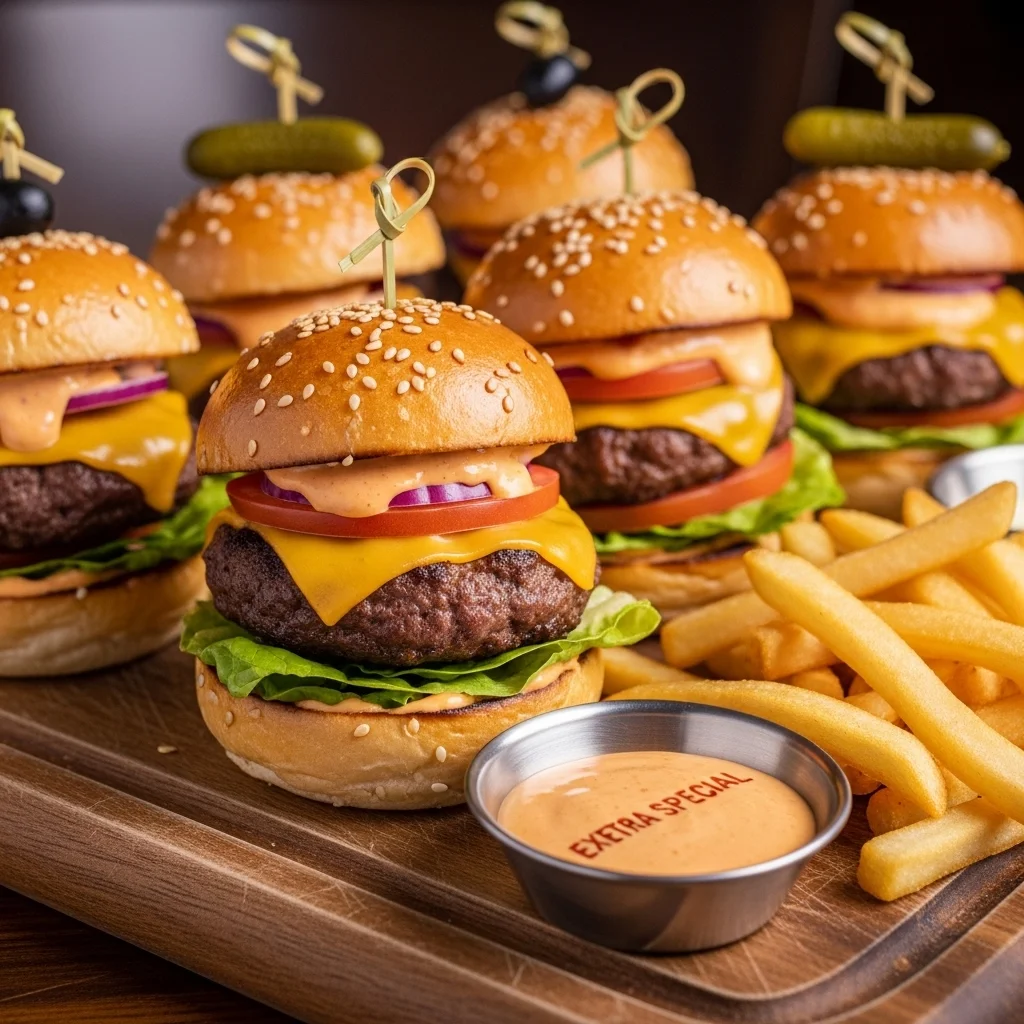
Mini beef sliders are the finger food that bridges the gap between a casual snack and a proper meal — and everyone absolutely loves them. Juicy, perfectly seasoned mini beef patties topped with melted American or cheddar cheese, crispy pickles, and a tangy, creamy special sauce all tucked into soft, toasted slider buns.
Ingredients:
For the beef patties:
- 600g ground beef (80/20 fat ratio)
- 1 tsp garlic powder
- 1 tsp onion powder
- 1 tsp Worcestershire sauce
- Salt and pepper to taste
- 8–10 slices American or cheddar cheese
- 12 small slider buns
For the special sauce:
- ½ cup mayonnaise
- 2 tbsp ketchup
- 1 tbsp yellow mustard
- 1 tbsp sweet pickle relish
- 1 tsp white wine vinegar
- ½ tsp garlic powder
- ½ tsp smoked paprika
Toppings:
- Dill pickle slices
- Shredded iceberg lettuce
- Thin tomato slices
- Finely diced white onion
- Butter for toasting the buns
Instructions:
Make the special sauce first: combine all sauce ingredients in a small bowl and mix until completely smooth. Taste and adjust it should be creamy, tangy, slightly sweet, and savory. Refrigerate until ready to use. This sauce improves as it sits so making it ahead is always better.
Combine ground beef with garlic powder, onion powder, Worcestershire sauce, salt, and pepper. Mix gently just enough to combine everything without overworking the meat, which makes tough patties. Divide into 12 equal portions and shape each into a flat patty slightly larger than the bun since they shrink during cooking.
Toast the slider buns cut-side down in a buttered skillet over medium heat for 1–2 minutes until golden. Set aside. This step is not optional toasted buns hold up to the juicy patty and sauce without going soggy.
In the same skillet over high heat, cook the beef patties for 2–3 minutes per side until a deeply browned crust forms. In the last minute of cooking, place a slice of cheese on each patty and cover the pan briefly with a lid to melt the cheese perfectly.
Spread special sauce generously on both halves of each toasted bun. Add shredded lettuce, a tomato slice, and the cheeseburger patty.
Top with dill pickle slices and a pinch of diced onion. Secure with a toothpick for presentation and serve immediately while the patties are hot and the cheese is still melted.
Pro Tip: Make the patties and sauce a few hours ahead and refrigerate separately. Cook the patties fresh to order just before serving — slider patties are so small they cook in minutes and taste dramatically better fresh off the heat.
Honey Sriracha Cauliflower Bites
Prep: 15 min | Cook: 30 min | Serves: 4–6 | Difficulty: Easy
These honey sriracha cauliflower bites are the vegetarian finger food that genuinely surprises everyone who tries them. Cauliflower florets are coated in a light, crispy batter, baked until golden, and then tossed in a sticky sweet-heat honey sriracha glaze that is absolutely addictive.
Ingredients:
For the cauliflower:
- 1 large head of cauliflower, cut into bite-sized florets
- ¾ cup all-purpose flour
- ¾ cup cold water
- 1 tsp garlic powder
- 1 tsp smoked paprika
- ½ tsp onion powder
- ½ tsp salt
- ¼ tsp black pepper
For the honey sriracha glaze:
- 3 tbsp honey
- 3 tbsp sriracha
- 2 tbsp soy sauce
- 1 tbsp rice vinegar
- 1 tbsp butter
- 2 garlic cloves, minced
- 1 tsp sesame oil
To serve:
- Sesame seeds and sliced green onions to garnish
- Ranch dressing or blue cheese dip alongside
Instructions:
Preheat the oven to 220°C (425°F). Line a large baking sheet with parchment paper. Cut the cauliflower into evenly-sized florets — uniformity is important so they all cook at the same rate and crisp up together.
Make the batter: whisk together flour, cold water, garlic powder, smoked paprika, onion powder, salt, and pepper until smooth. The batter should be the consistency of thin pancake batter. It should coat the cauliflower but not be so thick it becomes doughy.
Dip each cauliflower floret into the batter, letting the excess drip off, and place on the prepared baking sheet in a single layer. Make sure they are not touching each other, crowding causes steaming instead of crisping. Bake for 20–25 minutes until the batter is set, lightly golden, and developing a crust.
While the cauliflower bakes, make the honey sriracha glaze: melt butter in a small saucepan over medium heat. Add minced garlic and cook for 1 minute. Add honey, sriracha, soy sauce, and rice vinegar. Simmer for 3 minutes until the sauce thickens slightly. Remove from heat and stir in sesame oil.
Remove the baked cauliflower from the oven and transfer to a large bowl. Pour the honey sriracha glaze over the florets and toss gently to coat every piece. Spread back onto the baking sheet and return to the oven for 5–8 more minutes until the glaze is caramelized and sticky.
Pro Tip: The double-bake method — baking the battered cauliflower first, glazing, then returning to the oven is what makes these genuinely crispy rather than soft and soggy. Never skip that final glaze bake.

Bacon-Wrapped Dates Stuffed with Goat Cheese
Prep: 20 min | Cook: 20 min | Serves: 6–8 | Difficulty: Very Easy
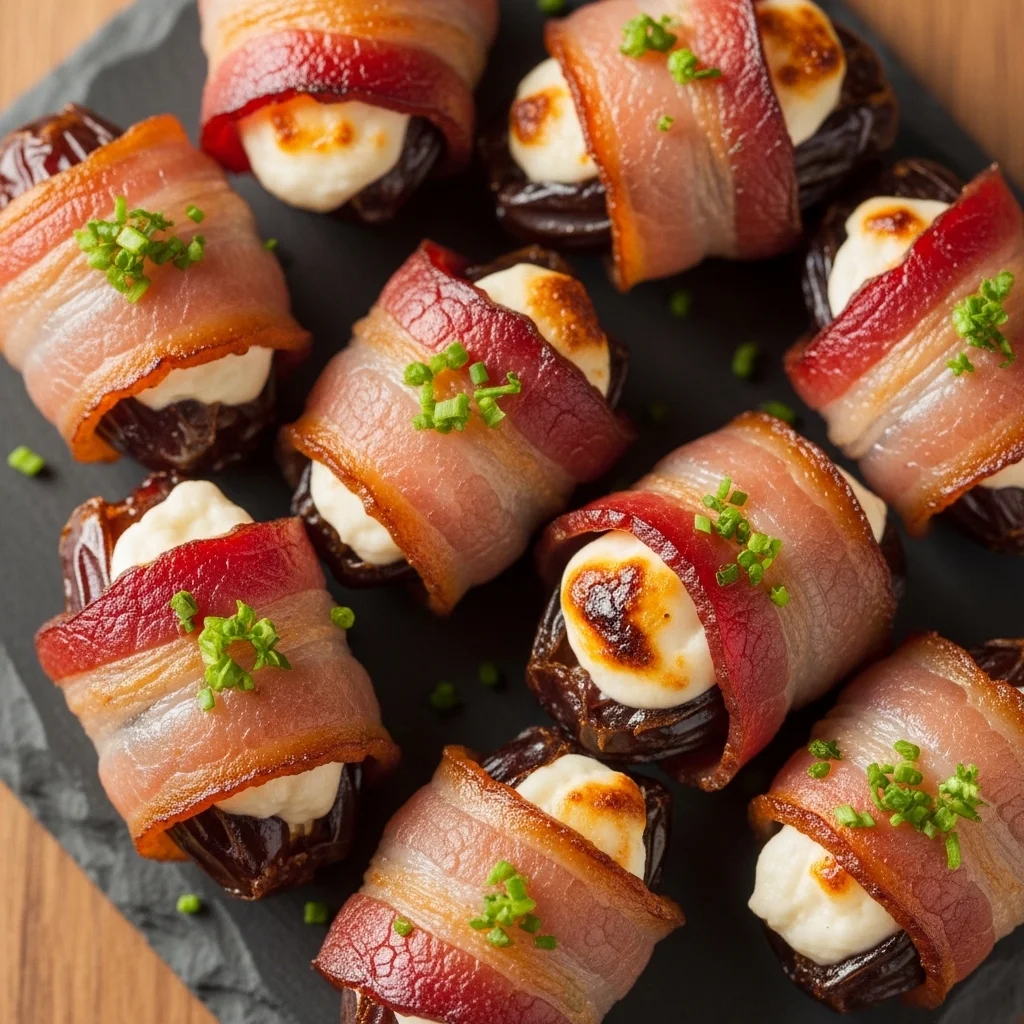
Bacon-wrapped dates stuffed with creamy goat cheese are the one finger food that consistently stops people mid-conversation and makes them immediately ask for the recipe. The combination of sweet, caramel-like Medjool dates, tangy creamy goat cheese, and salty, crispy bacon creates a flavor combination that is sweet, savory, salty, and creamy all in one perfect two-bite package.
Ingredients:
- 24 large Medjool dates, pitted
- 150g soft goat cheese (chèvre)
- 24 thin-cut bacon strips (halved crosswise so each piece wraps one date)
- 2 tbsp honey for drizzling
- 1 tsp fresh thyme leaves
- Pinch of chili flakes (optional but excellent)
- Toothpicks to secure
Instructions:
Preheat the oven to 200°C (400°F). Line a baking sheet with parchment paper or foil. If your dates are not already pitted, make a small slit lengthwise in each one and remove the pit, keeping the date as intact as possible.
Fill each pitted date with a small but generous amount of goat cheese about one teaspoon per date. Press the date gently closed around the filling. The goat cheese should peek out slightly at the slit opening.
Wrap each stuffed date tightly with a half strip of bacon, starting at one end and spiraling around to cover the date completely. The bacon ends tend to overlap at the bottom, place the date seam-side down on the baking sheet and secure with a toothpick through the center to keep the bacon in place during baking.
Arrange all the bacon-wrapped dates on the prepared baking sheet with some space between each one. Bake for 18–22 minutes until the bacon is fully cooked, crispy, and golden on the outside. At the halfway point, flip each date so the bacon crisps evenly on both sides.
Remove from the oven and let them rest for 2–3 minutes. The filling will be very hot straight from the oven. Arrange on a serving platter and immediately drizzle with honey. Scatter fresh thyme leaves and a pinch of chili flakes over the top for a finishing touch that elevates the entire platter. Serve warm.
Pro Tip: Use Medjool dates specifically; they are much larger, softer, and more caramel-like than regular dates and they hold the goat cheese filling without splitting during baking. Regular dates are too small and dry for this recipe to work properly.